10 Year Warranty

FREE SHIPPING on all orders through Sunday

CALL US TODAY 800-518-5242

Steam Shower Installation

You have now purchased your new Maya Bath steam shower and want to test it out! The following guide is written to outline the key steps that will be involved during a steam shower installation and highlight some common easy-to-avoid installation problems. Maya Bath cannot accept any liability regarding any costs incurred by preparatory or installation work. All steam shower installation instructions provided with the steam shower or by the original manufacturer should take precedence over this guide.

1. Finding a Qualified Installer

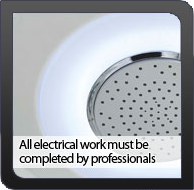
Water is an efficient conductor of electricity and the installation of electrical wiring in a bathroom can be a hazardous job. Maya Bath strongly advises that all electrical work is carried out by a qualified professional. It is advisable to choose a plumber for the installation of the steam shower as well.

If you cannot find a registered installer, Maya Bath can arrange a third party installation company to carry out this work. Although Maya Bath can assist in finding a registered professional, Maya Bath cannot guarantee the quality or professionalism of the work carried out and accepts no liability for any third party installer.

2. Preparatory Work

Prior to purchasing you should have confirmed the steam shower dimensions and know where in the bathroom you are placing the steam shower. The steam shower installation will require both a hot and cold water supply along with an electrical feed.

  • Water Supply: The manufacturer’s steam shower installation booklet will provide measurements to where the hot and cold feeds should be piped.  The steam shower will arrive with hot and cold braided hoses on the rear of the unit allowing the unit to be connected and pushed back into position. The water supply pipes should be recessed and not protrude more than ½ inch from the wall. Ball lever valves can be installed to allow quick shut-off of the water to the shower.
  • Electrical Supply: The 5.0KW steam generators require a 30Amp dedicated power supply to the steam shower. Typically, this will be wired back to the consumer box and can be located on a separate breaker switch. The rated working voltage of a majority of the Maya Bath steam showers is 220V at 60Hz.
  • Drainage: The manufacturer’s installation booklet will give measurements for positioning the shower’s drainage point. Typically, the shower will come with a flexible drain hose that will be connected to your drainage point.

At this stage you should carry out preparatory decoration as necessary. This may involve plastering, painting or tiling. CAUTION: Never knock nails or drill holes into walls without knowing what is hidden behind them!

3. Tray/Tub

Place the shower tray in its final standing position. Adjust the screw legs that are positioned across the bottom of the tray until the tray is level. This should be checked using a spirit level. Once the tray is level tighten the locking nuts to secure the height of each leg.

4. Top & Side Panels

Move the tray out from the wall about 15-20 inches to allow access to all sides of the cabin during installation. The order of panel placement should follow the specific shower installation instructions. Place sealant between each adjoining panel and also between each panel and the tray. Use the bolts supplied to firmly affix each panel together. Once all acrylic and glass panels have been secured the top piece can be placed onto the side panels. Use the bolts/screws supplied to firmly secure the top piece to the side panels.

5. Connect Adjoining Pipes & Wires

The overhead fan, lights and speakers will all be powered from the main control box. Each wire should be labelled and have matching connectors that come from the control box. These 12V DC wires should now be plugged together. The shower will have water pipes that run to the overhead shower and body jets from the 3-way thermostatic valve. These should be plugged into the corresponding connectors and tightened using the metallic pipe clips and a Phillips screwdriver.

6. Connect Water, Electrics & Drainage

Please check that the water supplies are balanced and at an adequate pressure. The steam showers come with stainless steel flexible hose lines in the back of the unit just like a house washing machine and will connect similar to a washing machine at your home.

Connect the dedicated 220V/110V power lines either directly to your breaker box or plug them into an outlet in the room. It is important that the ground wire is connected to a grounding point in the bathroom or the metal framing of the shower. The installer will be able to advise about correct grounding of the steam shower.

Finally, connect the flexible drain hose into your bathroom’s floor waste point and seal as necessary. Keep in mind that the drain is a flexible hose and you do have room to move it around underneath the tub/pan as well.

7. Sealant

Typically, you should now place a bead of white or clear sealant between the adjoining side panels. Sealant should also be placed between the side panels and the tray to stop any water running along any seams and over the edge of the shower tray.

Once sealant has been applied and allowed to dry, the steam shower should be tested for water tightness. Use the handheld shower to spray water against the water jets, all acrylic/glass panel fixing holes and along the join of all adjoining panels. Typically, it is not necessary to seal the top piece but this is left to the discretion of the installer. Check around the rear and sides of the steam shower to see whether any water has escaped and reseal where necessary. Also, the installer should check that all pipes and fittings are fully spanner tightened and not dripping any water.

Once the unit has been fully checked for water leaks and all electrical features such as lights, radio and steam tested then gently push the unit back into position.

Your Steam Shower Installation Check List

  • Recessed Hot and Cold water supply lines
  • Dedicated electrical supply lines
  • Floor drain setup
  • Sealant between all adjoining panels
  • Check that all pipes and joints are fully spanner tightened
  • Use hand shower to check for water leaks between adjoining panels, jets and other fixings
  • Sealant around mirror
  • All glass seals have been connected
  • All new pipework should be flushed to remove debris before connecting pipes to shower

Please note, the electrical installer of the steam shower is responsible for taking all proper precautions before and during installation as well as checking that the actual electrical equipment (wires, etc.) is not damaged prior to installation.

If you have recently purchased a bathroom product from Maya Bath and require an online copy of our installation manual then please send us a message using the contact form found on the Contact page, stating your request and model name.

SHOW COMPARE
Comparing 0 Products
X